
Hydrangea: How To Grow & Care For Indoor Hydrangea
Hydrangea plants have been adapted for successful cultivation in indoor environments. Hydrangeas were first cultivated in Japan, but ancient hydrangea fossils dating back 40-65 million years have been discovered in North America. Hydrangeas did not appear in Europe until 1736 when a colonist brought a North American variety to England. These attractive shrubs are known for their lush, rounded flower heads that come in a wide range of attractive colors, including shades of pink, blue, purple and white. They have become increasingly popular with indoor gardeners, adding garden beauty to homes, offices and other indoor spaces.
Key features of indoor hydrangeas:
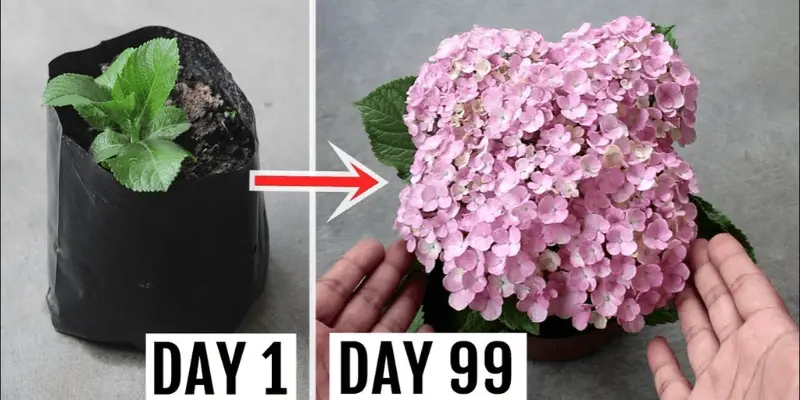
Year-round beauty: Indoor hydrangeas are prized for their ability to provide year-round beauty. Unlike their outdoor counterparts, which typically bloom during specific seasons, indoor hydrangeas can bloom at different times of the year, depending on their care and environmental conditions. This feature allows indoor gardeners to enjoy their lovely flowers regardless of the season.
Versatility: Indoor hydrangea shrubs are remarkably versatile in terms of decoration and aesthetic appeal. Their large, showy flower heads make them great candidates for stunning floral arrangements, eye-catching centerpieces, and stunning decorative accents in a variety of interior settings. Whether used as a focal point in a room or included in a floral display, indoor hydrangeas easily add beauty to any space.
Therapeutic and stress-reducing: Beyond their decorative value, indoor hydrangeas offer therapeutic benefits to those who nurture them. Engaging in indoor gardening, even on a small scale, has been shown to reduce stress, promote relaxation and enhance well-being. The process of caring for indoor hydrangea shrubs can be a rewarding and calming experience, making them a delightful addition to any indoor environment.
Adaptable Varieties: Indoor hydrangeas are available in a variety of species and varieties, each with their own unique characteristics and care requirements. Some are compact and ideal for small spaces, while others can be taller, making them suitable for larger rooms or areas. With a variety of hydrangea options available, indoor gardeners can choose the perfect one to complement their living spaces and personal preferences.
Custom Blooms: Indoor hydrangea enthusiasts have the exciting opportunity to influence the color of their plant’s blooms. The color of the flowers of hydrangeas can be changed based on the pH level of the soil, allowing growers to achieve their desired color. By adjusting soil acidity (low pH for blue flowers) or alkalinity (high pH for pink flowers), indoor gardeners can customize the palette of their indoor hydrangea shrubs.
How To Grow Hydrangea Indoor:
When growing a hydrangea indoor, consider the following factors:
Available Space: Assess the space you have available for your indoor hydrangea. Some varieties, such as compact bigleaf hydrangeas, are better suited to smaller spaces, while others require more space to grow.
Lighting conditions: Different types of hydrangea have different lighting requirements. Make sure the type you choose matches the available light in your interior space. Generally, hydrangeas thrive in bright, indirect sunlight.
Size and shape: Consider the final size and shape of the type of hydrangea you are interested in. Some are more compact and bushy, while others can be taller and more upright. Choose one that suits your space and design preferences.
Flower Color: Hydrangea flower color can vary based on factors such as soil pH. If you have a specific color preference, research the variety’s ability to produce the desired color.
Care Requirements: Understand the care needs of the chosen variety, including water requirements, moisture preferences, and temperature tolerance. Some varieties may be more forgiving than others.
Disease Resistance: While hydrangeas are generally hardy plants, some varieties can be more resistant to common pests and diseases, making them a low-maintenance choice for indoor gardening.
Availability: Check with local nurseries or online suppliers to ensure that the chosen variety of hydrangea is readily available in your area.
Personal preference: Finally, trust your personal preference and aesthetic sense. Choose a type that suits your taste and complements your interior decor.
Potting Mix & Soil Preparation For Indoor Hydrangeas
Creating the right soil environment is crucial for the healthy growth of indoor hydrangeas. These plants have specific soil and potting mix requirements that must be met to ensure they thrive.
Potting Mix for Indoor Hydrangeas
Choosing the right potting mix is the foundation of successful indoor hydrangea care. Here’s what you need to consider:
- Well-draining mix: Choose a potting mix that drains well. Hydrangeas do not like their roots to sit in water, so a mixture that can withstand high humidity is essential. You can buy a commercial potting mix that is labeled for hydrangeas or make your own.
- Peat moss or coconut coir: These materials are great for retaining moisture in the soil while also allowing drainage. Mix them into your potting mix to improve water retention.
- Perlite or Vermiculite: Adding perlite or vermiculite to your potting mix increases aeration and drainage. It prevents soil compaction and root rot.
- Organic Matter: Hydrangeas appreciate some organic matter in their soil. You can add well-rotted manure or old compost to provide nutrients and improve soil structure.
- pH-Adjustable Mix: Consider a potting mix that allows you to adjust the pH level. Hydrangea flower color can vary based on soil pH, so having the ability to change the pH is an advantage if you want to influence the color of your flowers.
Soil preparation
Once you’ve chosen the right potting mix, follow these steps to prepare the soil:
- Choose a suitable container: Make sure your container has drainage holes to prevent waterlogging. Choose a pot that is 1-2 inches larger in diameter than your hydrangea’s existing root ball.
- Partially fill the pot: Fill the bottom of the pot with a few inches of your chosen potting mix. This creates a stable base for your hydrangea.
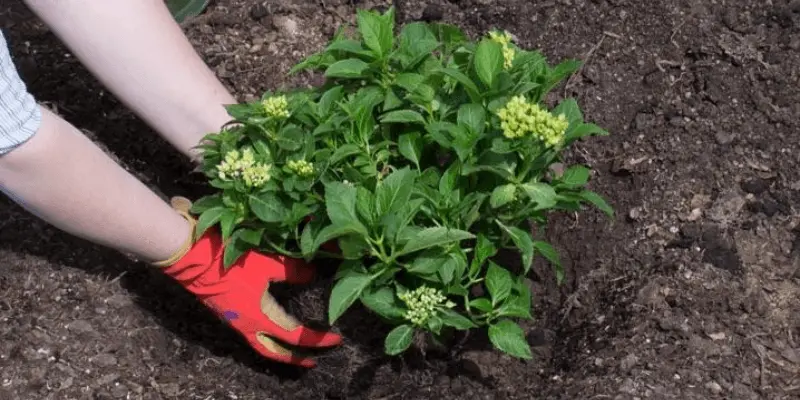
- Position your hydrangea: Carefully remove your hydrangea from its current pot and gently shake off any excess soil. Place it in the new container so that it sits at the same depth as it did in its previous pot.
- Fill with potting mix: Fill the rest of the pot with your potting mix, making sure the root ball is covered but not buried in the mix. Leave about an inch of space between the top of the soil and the rim of the pot.
- Water well: After potting, water your hydrangea thoroughly to help settle the soil and eliminate air pockets around the roots.
- Mulch: Applying a layer of organic mulch on top of the soil can help conserve moisture and maintain a stable soil temperature.
- Adjusting the pH: If you want to influence the color of your hydrangea flowers, adjust the soil pH accordingly. For blue flowers, make the soil more acidic (low pH); For pink flowers, make it more alkaline (higher pH).
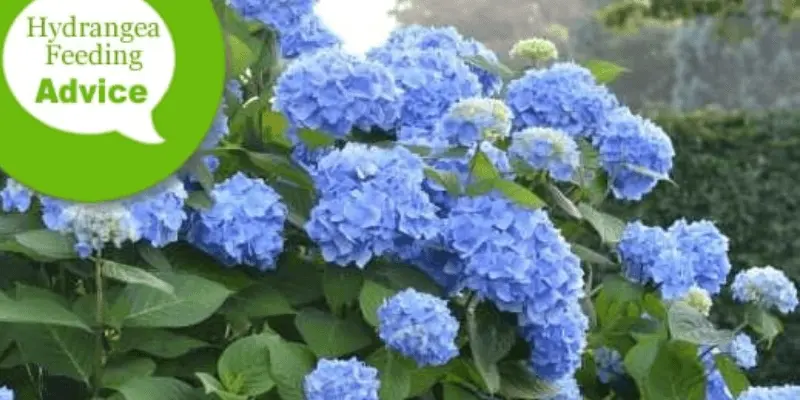
Feeding and Fertilizing Your Indoor Hydrangeas

Feeding and fertilizing your indoor hydrangeas is essential to ensure they receive the nutrients they need for healthy growth and vibrant blooms. In this section, we’ll review the types of fertilizers to use, the timing of fertilization, and the best practices for keeping your indoor hydrangeas thriving.
Fertilizer’s Types
When it comes to feeding indoor hydrangeas, you have several fertilizer options:
- Balanced fertilizers: These are fertilizers with equal or near equal proportions of the three primary nutrients: nitrogen (N), phosphorus (P), and potassium (K). Look for a balanced fertilizer with an N-P-K ratio such as 10-10-10 or 20-20-20.
- Slow-Release Granular Fertilizers: These are convenient because they release nutrients slowly over time, providing a constant supply to your hydrangeas. Follow the manufacturer’s instructions for application rate.
- Liquid Fertilizers: Liquid fertilizers are fast acting and can be applied directly to the soil or as a foliar spray. They are quickly absorbed by the roots and are a good choice for hydrangeas that need nutrients quickly.
- Organic Fertilizer: If you prefer an organic approach, consider using an organic fertilizer such as compost or well-rotted manure. They provide nutrients while also improving soil structure.
Fertilization Timing
Proper fertilization timing is critical to the well-being of your indoor hydrangeas:
- Spring feeding: Start fertilizing your indoor hydrangeas in early spring, usually when you see new growth emerge. This is the beginning of their active growing season, and they will benefit from the extra nutrients.
- Mid-Summer Booster: In mid-summer, provide a second round of fertilizer to encourage continued plant growth and flower bud development.
- Fall Fertilizer: If your hydrangea continues to grow through the fall, consider applying more fertilizer. However, reduce the dose to avoid promoting excessive growth that has not had time to harden off before winter.
Best Practices
Here are some great ways to feed and fertilize your indoor hydrangeas:
- Dilution: Always follow the manufacturer’s instructions for dilution or application rate when using liquid fertilizers. Over-fertilizing can harm your plant.
- Avoid Fertilizing When the Soil is Dry: Never fertilize in dry soil. Water your hydrangeas well a day or two before fertilizing to ensure proper absorption.
- Water After Fertilizing: After fertilizing, water your plant again to help distribute the nutrients to the root zone.
- Adjust the pH if desired: If you want to influence the color of your hydrangea flowers (eg, blue or pink), adjust the soil pH accordingly, as discussed in the Soil Preparation section. has been done
- Monitor Growth: Monitor your hydrangea’s growth and adjust your fertilization schedule if needed. If the plant shows signs of nutrient deficiency (eg yellowing of leaves), consider supplemental feeding.
- Winter Dormancy: Reduce or eliminate fertilization during the winter months when your hydrangea is dormant.
How To Care For Indoor Hydrangea
Although indoor hydrangeas can thrive in the right conditions, they can have a variety of problems that require attention and care. Let’s examine some of the common problems you may encounter when growing indoor hydrangeas and provide solutions to deal with them effectively.
- Wilting Leaves:
Problem: If you notice your hydrangea’s leaves drooping or wilting, it could be due to overwatering or too dry indoor conditions.
Solution:
Water the plant thoroughly when the top inch of soil feels dry.
Place a tray filled with water and pebbles near the plant to increase humidity around it.
Make sure your hydrangea gets adequate indirect sunlight without exposing it to direct, strong sunlight, which can cause excessive humidity.
- Falling flowers:
Problem: Hydrangea flowers can become heavy and droopy, especially when they absorb too much moisture.
Solution:
After watering, gently shake off any excess water from the flowers.
Use a stake or support to help the stems and flowers stay upright.
Avoid overwatering to prevent excessively heavy blooms.
- Yellow Plants:
Problem: Yellowing of leaves can indicate nutrient deficiencies, pests or diseases.
Solution:
Check for signs of pests (for example, aphids or mealybugs) and treat accordingly if present.
Make sure you are providing the proper fertilizer based on the plant’s needs.
Inspect the roots for signs of root rot, which can lead to nutrient absorption problems. If root rot is suspected, repot the plant in fresh, well-drained soil.
- Leggy Growth:
Problem: Leg growth occurs when your hydrangea grows tall and spindly with weak stems.
Solution:
Cut leg growth back to encourage bushy growth.
Make sure your plant is getting adequate light. If it is reaching for light, consider moving it to a brighter location.
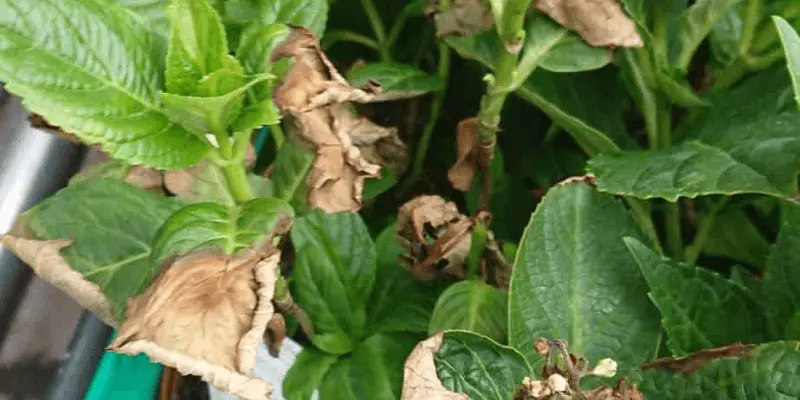
- Brown spots on leaves:
Problem: Brown spots on hydrangea leaves can indicate fungal diseases such as powdery mildew or botrytis blight.
Solution:
Isolate the affected plant to prevent the spread of the disease.
Cut off and destroy the affected leaves.
Improve air circulation around the plant by keeping it away from other objects or plants.
Adjust watering methods to keep plants dry.
- Slow growth:
Problem: If your indoor hydrangea isn’t growing as expected, it may need more nutrients or better care.
Solution:
Make sure your plant is getting the proper fertilizer during the growing season.
Check for signs of pests or diseases that may inhibit growth and treat if necessary.
Assess plant location for proper light and humidity levels.
- No blooms:
Problem: A lack of blooms on indoor hydrangeas can be frustrating.
Solution:
Make sure the plant is getting the right amount of light. Hydrangeas need bright, indirect sunlight to bloom.
Adequate feeding with a balanced fertilizer can promote blooming.
If your hydrangea is a young plant, it may need more time to establish before producing flowers.